Careteam administration
Document library
Learn how to add documents into the library for Action Plan templates and Action Plans.
Last updated on 27 Oct, 2025
The Document library is the location of organizational documents that are provided to the patient and their supporters. These documents are typically brochures, FAQs, and educaitonal handouts for example. The documents added into the library can be added into Action Plan templates and are available for the team to add directly into patient Action Plans. The Document library can be thought of as the source of truth for all organizational approved patient documents.
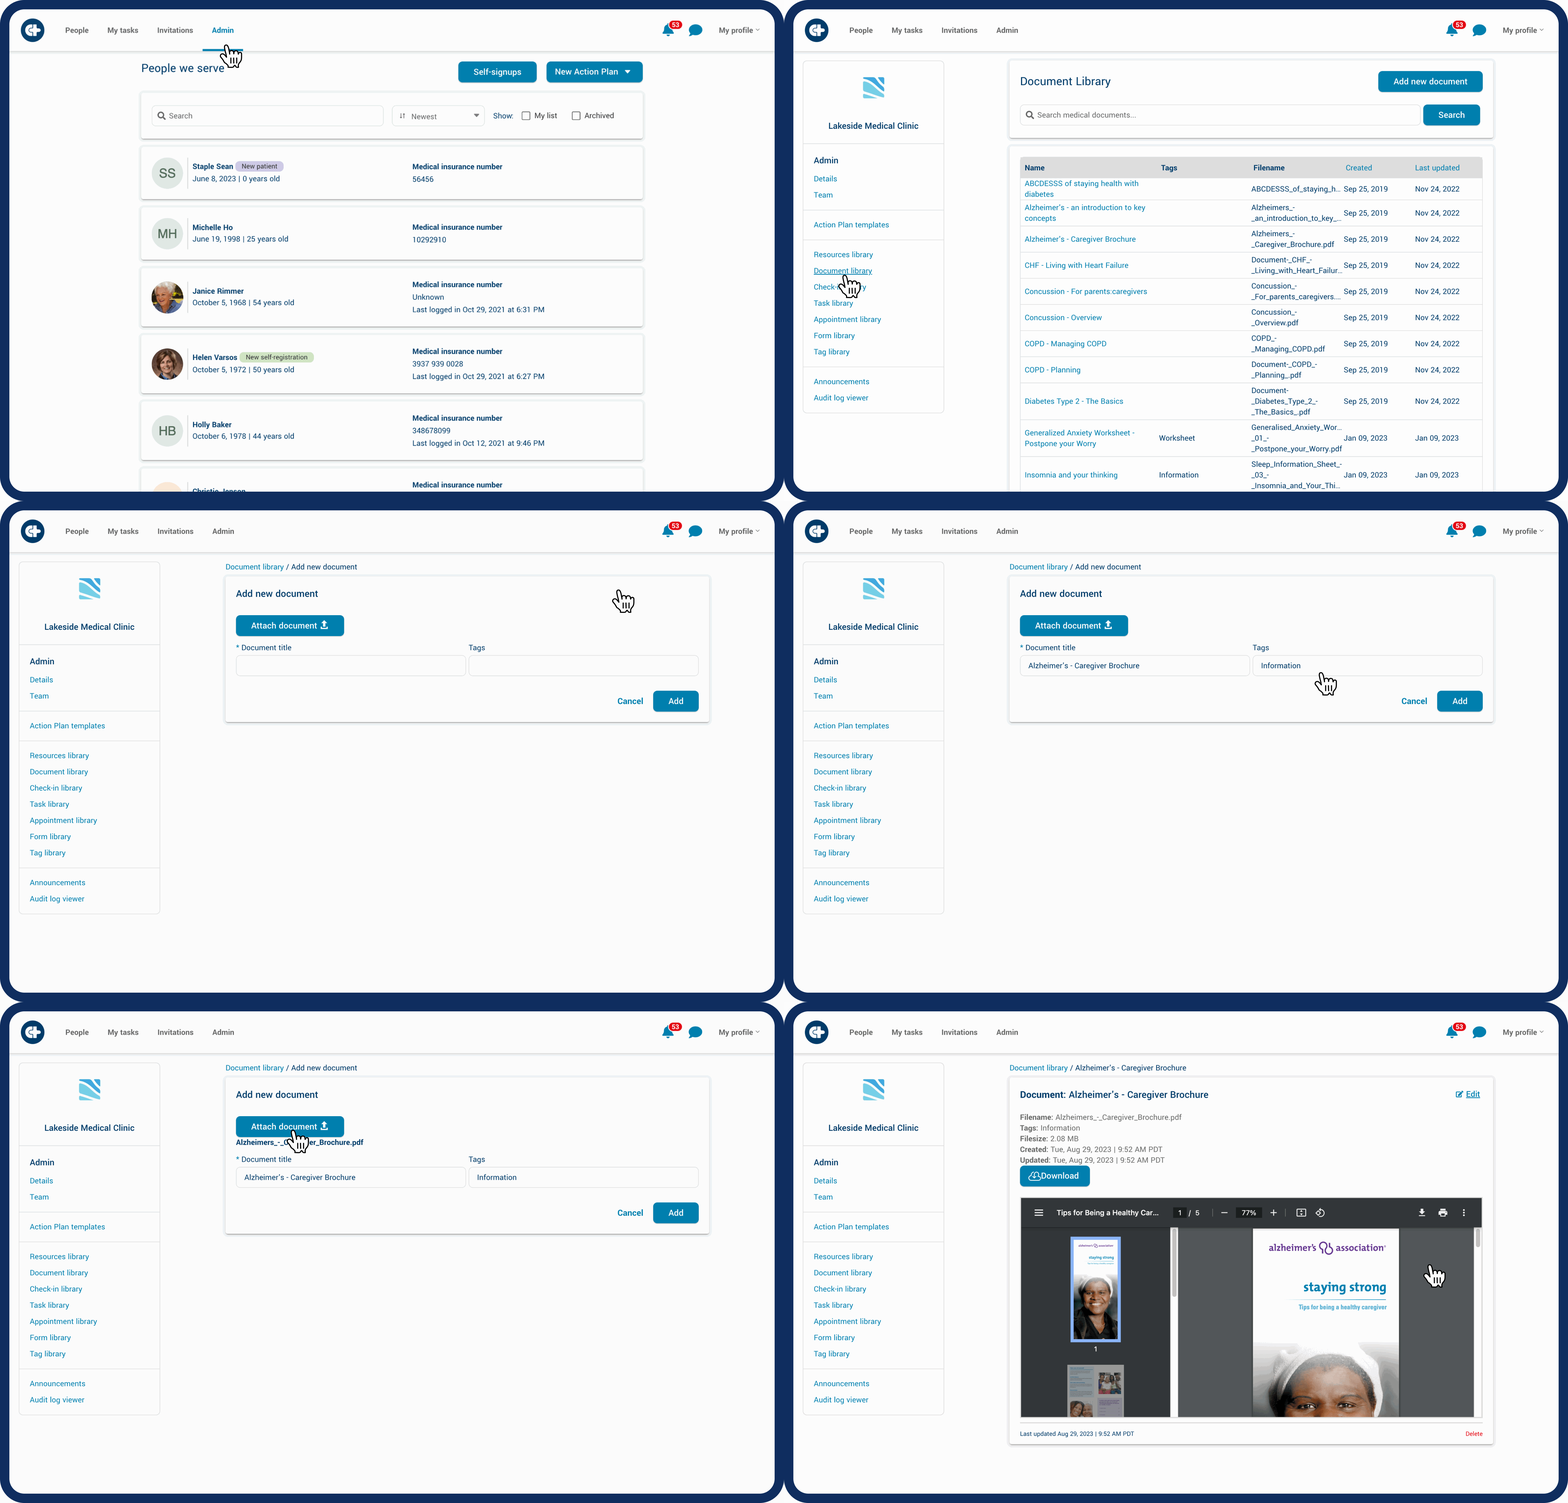
Only users identified as administrators can add documents into the library. Follow these steps to add documents into the library:
Click on the "Admin" tab.
Click on the "Document library" link on the left side.
Documents currently added to the library will be visible in the list. You can search by name, tag or pagination.
Click "Add new document".
Add a name for the document and select necessary tags to help for future searching or filtering.
Click "Attach document". Locate the document you wish to upload.
Click "Add".

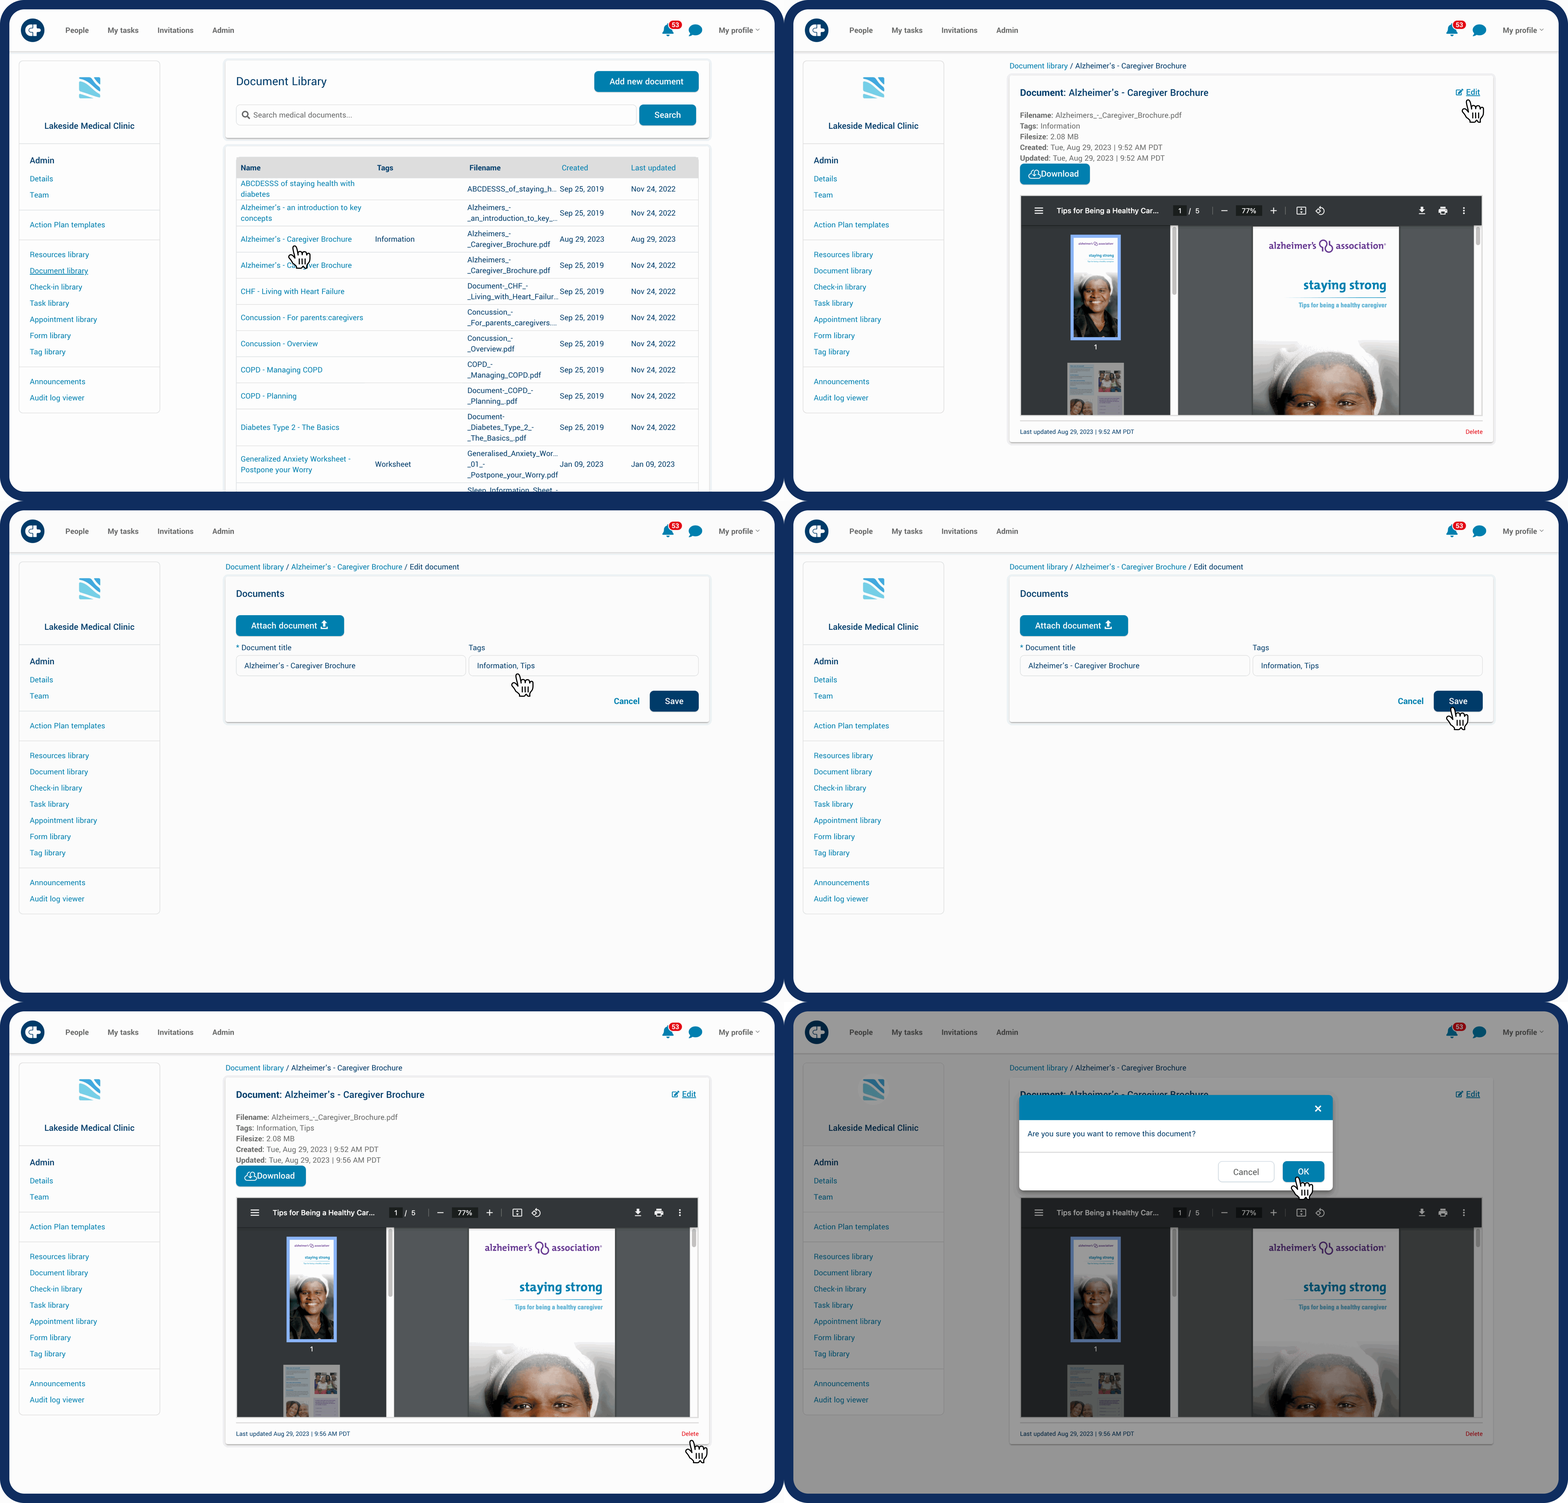
Edit or remove a document by following these steps:
Click on the document that you want to edit or remove.
Click on the blue "Edit" button on the top right to edit.
Click "Save" when you are done.
Click on red "Delete" to delete the document.

Tip: It’s best practice to add all documents to the library, and associate them to Action Plans. Documents attached directly to an Action Plan will not appear in the central library. Any changes you make to the document within the library will be reflected in the associated Action Plans.
